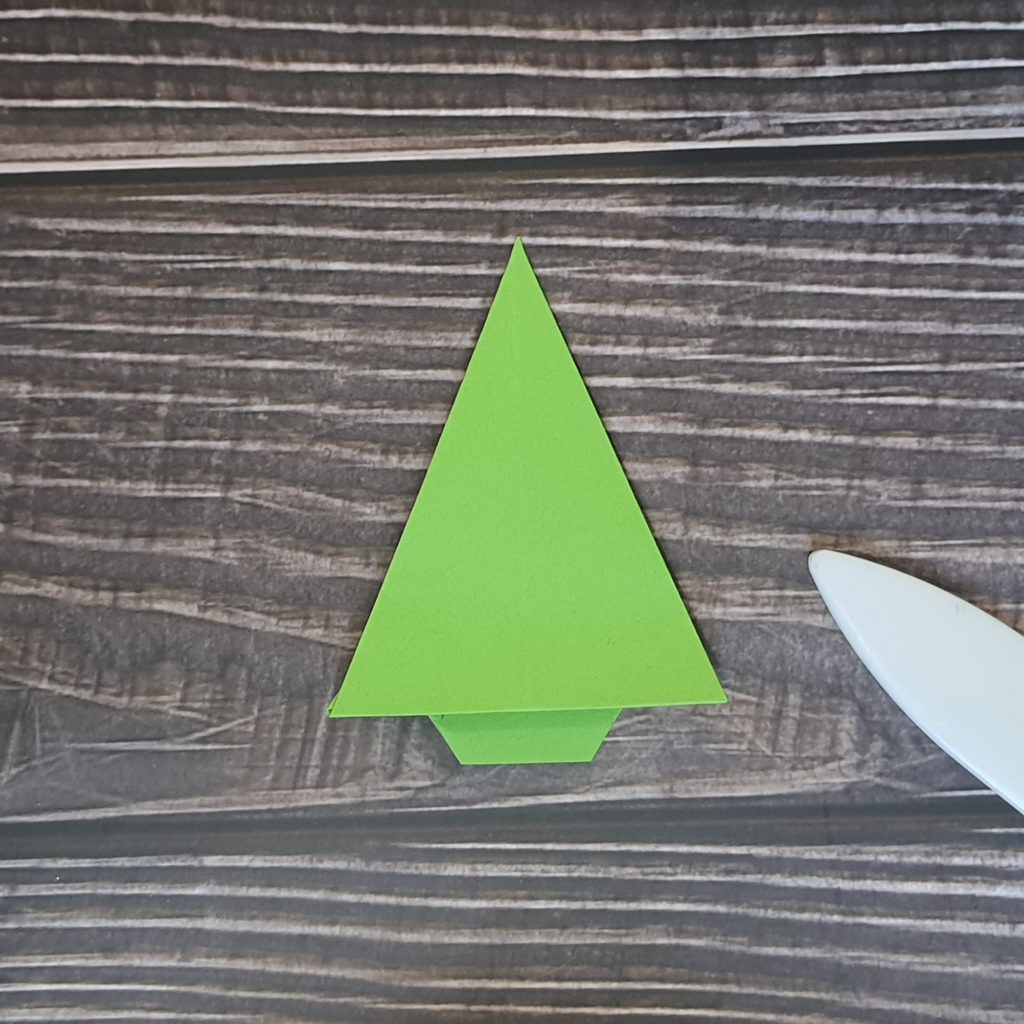
These paper trees are incredibly simple and ever so cute. They look great made from patterned or plain paper. Use them to decorate your handmade Xmas cards, or make up some small ones for gift tags.

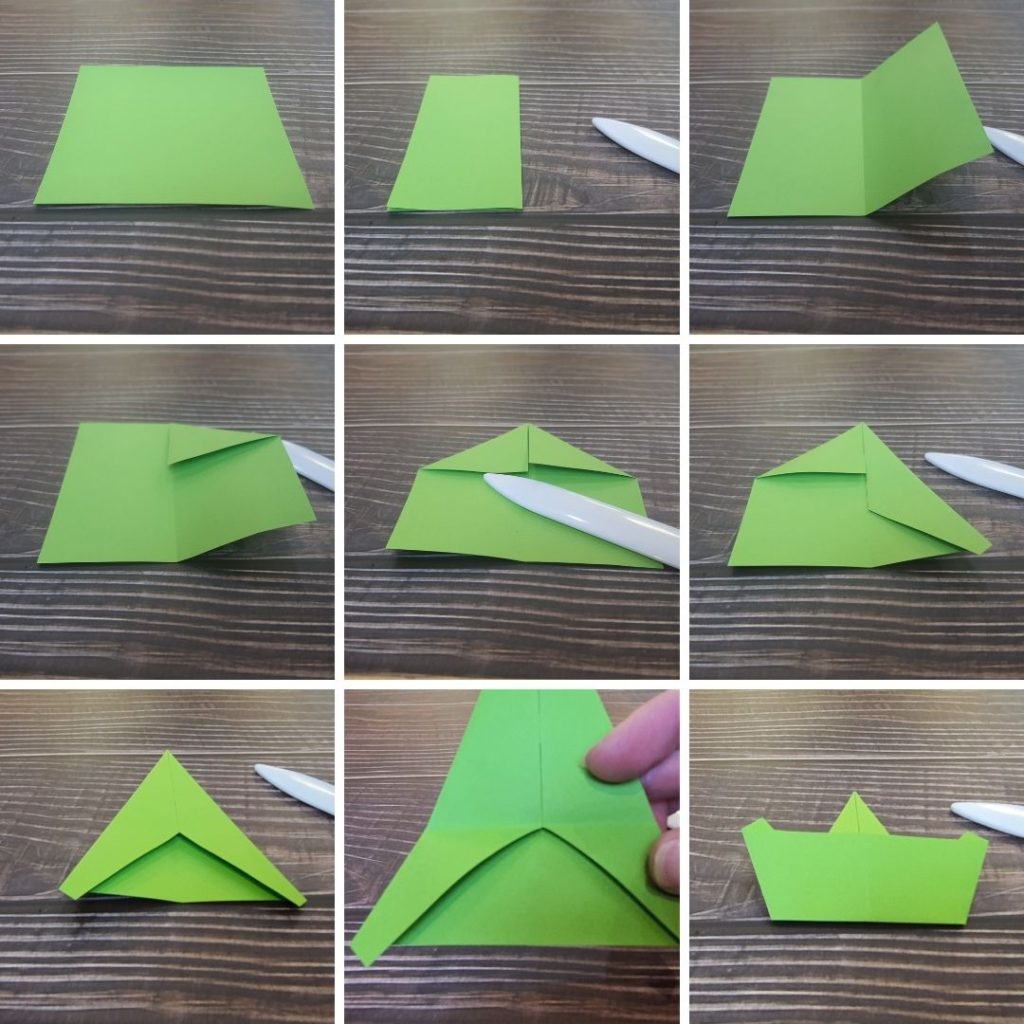
- Ok, so to start this off, it’s a bit like making a paper plane. Fold the paper in half, side to side, and unfold.
- Fold the top corners in to the crease you’ve just made, so the tops forms a triangle.
- Repeat this step, making a narrower triangle at the top.
- Fold the bottom up, at the point where the bottom of the edges meet (see bottom middle pic).

- Unfold.
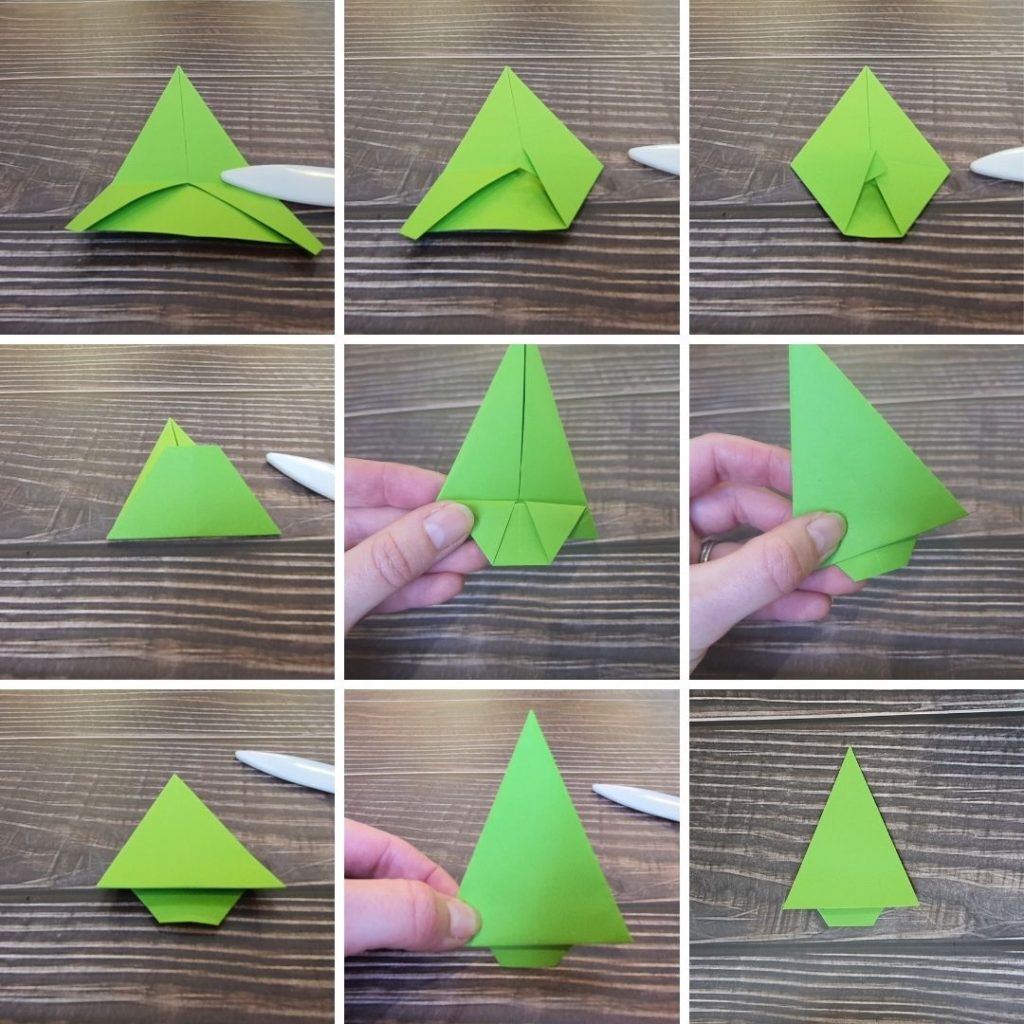
- Fold each of the bottom points up to meet the crease you made in the last step.
- Fold this bottom section up again, along the existing crease.
- This next and final step creates the ‘trunk’ of the tree – take the section you’ve just folded up and fold the top part of it down.
- Turn the model over so you can see how much you’d like it to stick out from the bottom of the triangle.
- You may find it doesn’t lay quite flat, so use a dab of glue to secure if you’re going to be using this in other crafts.
